
A plain-spoken, step-by-step walkthrough for first-time DIYers picking and applying a garage floor epoxy kit, from concrete prep to topcoat.
So you're staring at a dusty, stained garage floor and thinking about a garage floor epoxy kit for the first time. Good move. A properly applied epoxy system holds up to hot tires, oil drips and daily foot traffic better than bare concrete or a coat of paint. But a kit is only as good as the prep work behind it. Skip a step and you'll be scraping peeling epoxy off your slab in a year instead of enjoying a floor that looks like a showroom.
This guide walks through the whole process in order: testing your concrete, prepping it, priming, coating and topping it off. We'll point out where a garage floor epoxy kit gets people into trouble and what to buy instead. We ship nationwide, but if you're in Des Moines, Clive, Ankeny, Urbandale or West Des Moines, you can pick up everything same day.
What's Actually in a Garage Floor Epoxy Kit
Most kits bundle a two-part epoxy base coat, a mixing container, a roller frame and cover, and sometimes decorative flake. Some include a topcoat, some don't. Read the label before you buy so you know what you're getting and what you'll need to add.
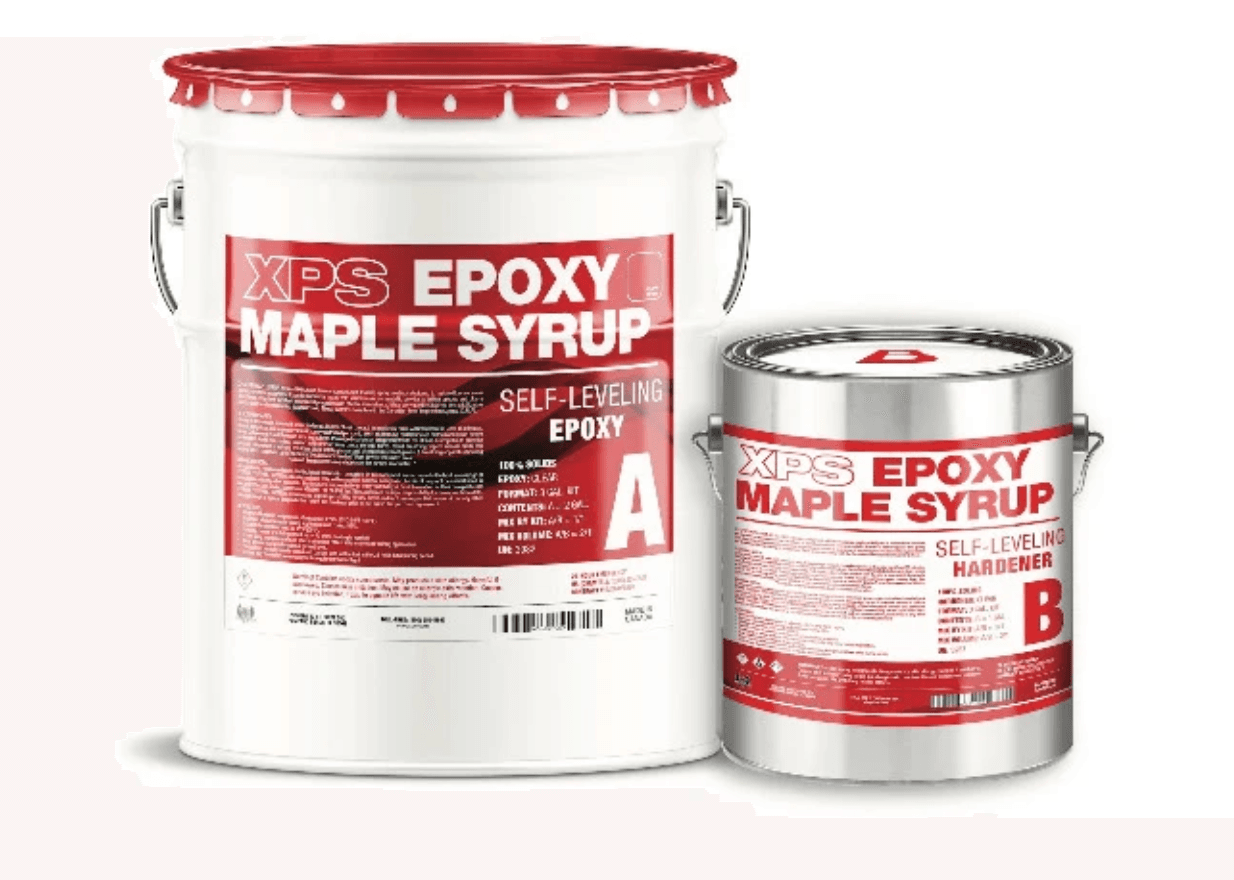
For a first garage floor, we usually point people to the Clear Garage Floor Epoxy Kit - Maple Syrup 3 Gal. Kit ($140.00). It's a two-component clear epoxy system that gives a smooth, glassy finish over broadcast flake or color, and it's sized right for a standard one-car or two-car garage bay. Check the product page for exact coverage, since slab porosity changes how far a batch stretches.
If you want more chemical resistance and a faster cure for a shop or heavy-use garage, look at a polyaspartic system instead of straight epoxy. More on that below.
Step 1: Test and Prep the Concrete
Epoxy doesn't stick to dirty, sealed or wet concrete. Before you open a kit, do three things.
- Check for existing sealers. Splash water on the slab. If it beads up instead of soaking in, there's a sealer or curing compound on there that has to come off.
- Test for moisture. Tape a square of plastic sheeting to the floor overnight. Condensation under the plastic in the morning means you have moisture vapor moving up through the slab, and that will cause bubbling or peeling no matter how good your epoxy is.
- Grind, don't just acid etch. A concrete grinder with a diamond cup wheel opens the pores of the slab so the epoxy can actually bite in. Etching with acid is the old-school method, but it's inconsistent and hard to rinse completely. Grinding gives you a repeatable, mechanical profile every time.
If you're only doing one garage, renting or buying a compact grinder plus a HEPA dust extractor keeps the dust out of your lungs and off every surface in the house. Concrete dust from grinding is fine and travels far without proper extraction.
Step 2: Patch Cracks and Deal With Moisture
Fill hairline cracks and control joints with a flexible filler before you coat, not after. A polyurea joint filler stays flexible as the slab moves with temperature swings, so it won't crack out again in a season. If your moisture test came back positive, talk to our staff before you buy a topcoat. Some slabs need a dedicated moisture vapor barrier product under the epoxy, and that's a different system than a standard garage floor epoxy kit. We can walk you through what your specific slab needs. You can always reach out through our contact page if you want a second opinion before you commit to a plan.
Step 3: Prime and Apply the Base Coat
Once the floor is ground, patched, vacuumed and dry, you're ready for the base coat. Mix the two components exactly per the kit instructions and pour it in ribbons across the floor. Work in sections you can reach without stepping back into wet epoxy, usually starting at the back wall and working toward the garage door.
A 3/8-inch nap roller works for most base coats, but check your kit's instructions for the recommended nap size. Keep a wet edge as you go so you don't get lap marks where sections overlap and start to set up.
This is the step where the Clear Garage Floor Epoxy Kit - Maple Syrup 3 Gal. Kit ($140.00) does its work. Because it's a clear system, any color or flake you broadcast into it stays visible once it cures, instead of getting muddied by a tinted base.
Step 4: Broadcast Flake or Color, If You're Using It
If your kit includes color flake, this is when it goes down, while the base coat is still tacky. Toss it by hand in a light, even pattern rather than dumping it in piles. Too much flake in one spot creates texture that's hard to smooth out later. Let the floor cure fully per the kit instructions before you walk on it or move to the topcoat.
Step 5: Choose Your Topcoat
A bare epoxy base coat left uncovered will scuff, yellow under UV light and show wear faster than one protected with a topcoat. You've got two common options.
Epoxy topcoat. Straightforward, budget-friendly, and matches the chemistry of most base coats.
Polyaspartic topcoat. Cures faster, resists UV yellowing better, and holds up well to hot tire pickup, which is the marks left behind when a warm tire sits on a soft coating and lifts a layer of it when the car moves. For garages that see daily vehicle traffic, we usually recommend the Polyaspartic Floor Coating - Rockhard Garage Poly 2 Gal. Kit ($240.00). It's built for commercial and industrial traffic, so a residential garage is well within what it can handle.
Apply the topcoat the same way you did the base coat: mix per instructions, roll in manageable sections, and keep a wet edge. Follow the recoat window listed on the product page closely. Wait too long between coats and you risk poor adhesion between layers.
Common First-Timer Mistakes
A few things trip up almost every first-time epoxy floor.
- Rushing the cure time. Manufacturer cure times are there for a reason. Driving on a floor before it's ready is the most common cause of epoxy floor peeling.
- Skipping the grind. A quick sweep and a mop is not surface prep. If the epoxy doesn't have a mechanical profile to grab onto, it will lift.
- Ignoring moisture. No topcoat fixes a moisture problem underneath it.
- Mixing epoxy off-ratio. Eyeballing the two-part mix instead of measuring leads to soft spots that never fully cure.
- Working in the wrong temperature. Most epoxy and polyaspartic products have a minimum and maximum application temperature. Check the label before you start, especially if you're coating a garage in early spring or late fall in Iowa.
What We'd Buy
If we were doing a first garage floor from scratch, here's the short list.
- Clear Garage Floor Epoxy Kit - Maple Syrup 3 Gal. Kit ($140.00) as the base coat system.
- Polyaspartic Floor Coating - Rockhard Garage Poly 2 Gal. Kit ($240.00) as a durable, UV-stable topcoat for a garage that sees regular vehicle traffic.
- A diamond cup wheel and rental or shop grinder for surface prep, sized to your floor area.
What to Do Next
A garage floor epoxy kit rewards patience during prep and punishes shortcuts later. Test your slab, grind it properly, patch what needs patching, and give each coat the cure time it's asking for.
If you'd rather learn the process hands-on before you commit to your own garage, our 3-day epoxy class next door in Clive walks through prep, mixing and application on real concrete. Check the 3-day epoxy class schedule if you want to see it done before you do it yourself.
When you're ready to buy, Shop epoxy supplies with local pickup in Clive. We stock the full kit lineup along with grinders, dust extractors and diamond tooling, and we ship nationwide if Iowa isn't on your route.
How long does a garage floor epoxy kit take to cure?
Cure times vary by product and temperature. Check the specific kit's product page for recoat windows and full cure time, and don't drive on the floor until the manufacturer says it's ready.
Do I need to grind my garage floor before applying epoxy?
Grinding gives the epoxy a consistent mechanical profile to bond to. It's more reliable than acid etching and is the method we recommend for any first-time garage floor project.
Can I use a garage floor epoxy kit over an existing coating?
Only if that coating is fully bonded, clean and properly profiled. If the old coating is peeling or you're not sure what it is, grind it off and start with bare, prepped concrete.
XPS Xpress Team
Need product or a quote?
Our team answers the phone Monday through Saturday.